In Step 1, you will use the Project Wizard to enter project information, select a design standard, and create scenarios to represent short- and long-term conditions.
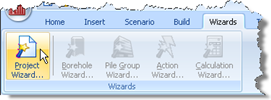
Open the Project Wizard by selecting the Wizards tab on Repute’s ribbon and then clicking on the Project Wizard button.
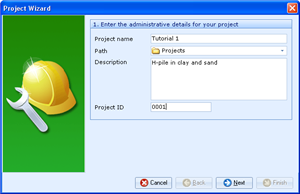
When the Wizard appears, type “Tutorial 1” in the Project name box. Choose the folder where you want to save this project by using the Path control. (If you do not change the setting here, it will be saved in Repute’s Projects folder.)
Enter “H-pile in clay and sand” in the Description box.
Enter “0001” in the Project ID box.
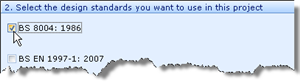
Click Next to display the next page. The design standards that appear here depend on which edition of Repute you are running (the Enterprise Edition supports more design standards than the Standard and Professional editions).
Select BS 8004: 1986 by clicking on the relevant checkbox (a tick mark appears next to a standard when it is selected).
Click Next to display the next page.
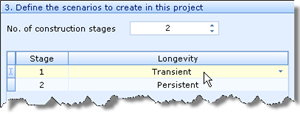
Increase the number of construction stages to 2.
In the table, change the longevity of Stage 1 to “Transient” but leave Stage 2 as “Persistent”.
Click Next to display the final page.
If you wish to review any of the settings you have made, click Back to return to the relevant page. Otherwise, click Finish to generate the project.
The Project Wizard then:
Creates Site 1, Ground 1, Design Standard 1, and Stages 1-2
Adds Ground 1 to Stages 1-2
Creates a new project named Tutorial 1.rpx with all these items
You can view these items by right-clicking anywhere inside the Project Manager to display its context menu and selecting the Expand All command. The Project Manager will then look as shown in the screenshot below.

To view the properties of any particular item:
Select the item you want to inspect in Repute’s Project Manager (e.g. Site 1)
Display the Property Inspector for that item by:
Right-clicking on the item, to display its context menu, and clicking the Properties... command
Or ... Double-clicking on the item
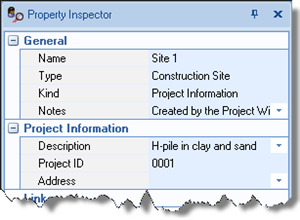
Repute’s Property Inspector will open and display the properties of the selected item. (For example, for Site 1 the description is shown as “H-pile in clay and sand” and the Project ID as “0001”.)
A copy of this step can be found at [Projects]\Tutorial 1\Step 1.rpx.
Step 2 - create the borehole